Showing posts with label Application. Show all posts

Thursday, February 9, 2012

How to Use the Reveal Formatting Feature in Word 2010

00_reveal_formatting_pane
Are you used to the Reveal Codes feature in WordPerfect? These codes show you your text with integrated formatting codes that seem similar to HTML formatting. However, if you’re using Word, there is no comparable function.
WordPerfect treats text and formatting codes the same, putting start and end codes around text as you format it. When you display the Reveal Codes window, you see the formatting code markers integrated with the text. You can select the code markers and even insert and delete them manually. For example, if you manually delete an end code, the rest of the document will be formatted according to the start code that now has no corresponding end code.

In Word, text and formatting are treated completely independently.  Word stores the formatting for the text in a different part of the file than the text to which the formatting applies. It is not inserted in the text stream. Instead, Word tracks the character and paragraph formatting you apply throughout your document, and does concern itself with start and end codes.
Whereas WordPerfect has both modes, WYSIWYG (“what you see is what you get”) and Reveal Codes, Word only has the WYSIWYG mode. You apply bold to some text and you see that text as bold text. You cannot see the bold codes around your text.
However, there is a way to see how selected text is formatted. Word won’t show you start and end codes like WordPerfect because it doesn’t use them. But, when you select some text in Word and press Shift + F1, the Reveal Formatting pane displays. Word shows you, in list format, how the selected text is formatted with respect to the Font, Paragraph, and Section.

If you want to change the formatting of the selected text, you can do so using the Reveal Formatting pane. For example, if you want to make the selected text not bold, but italic instead, click the Font link in the Reveal Formatting pane.

The Font dialog box displays. Make any changes you want and click OK. The text reflects the change as does the Reveal Formatting pane.

Do not confuse the Reveal Formatting pane with the feature in Word that shows hidden formatting symbols. Clicking the paragraph symbol in the Paragraph section of the Home tab, shows hidden symbols such as spaces, tabs, and paragraph marks. These are different than the formatting listed on the Reveal Formatting pane.
NOTE: You can also press Ctrl + * to show and hide the formatting symbols.

You might want to show both the Reveal Formatting pane and the hidden formatting symbols to easily track your formatting and the spacing between words and paragraphs and tabs.

Scup: Cross-Platform Batch Audio Track Uploader For SoundCloud

Established in 2007, SoundCloud is arguably the most popular online audio distribution platform for collaboration, promotion and distribution of audio content by artists and music promoters. While the web version of the platform is a no brainer for anyone who is familiar with the service, we don’t usually come across a lot of desktop applications catering to SoundCloud. For that reason, when we stumbled across Scup (short for SoundCloud Uploader), we considered it worthy of being taken for a spin. In its essence, Scup is an Adobe AIR-based, cross-platform application that lets you upload multiple tracks to your SoundCloud account and create a set on the fly. The application supports specifying all necessary parameters, such as genre, set and track types, license, record label etc, making your sets ready for publishing in every sense.
When launched for the first time, Scup will present you with an authentication box, requiring connection with your SoundCloud account. Hit the Yes please, move ahead button to launch the authentication page in your default browser. If you are not logged into SoundCloud at present, do so at this point.
ConnectWith_SoundCloud
The browser pane will ask you for a confirmation of the operation, after which you will be given a unique authentication code. Enter that in Scup, and your account should be linked. In our experience, copy/pasting the code didn’t work, and you’ll need to manually key it in for Scup to recognize.
Connect_Web_Interface
With authentication out of the way, you will be greeted by Scup’s main interface. Please note that this interface is all that is to this application, as there are no options or customizations. Everything that you get in this interface should cater to all your SoundCloud uploading needs, and you can not only batch upload tracks, but also specify their parameters, such as the genre, set and track type, license version, keywords, record label, release number, release date, EAN/UPC and buying link for the set.
To begin, drap and drop audio files over Scup and define the parameters for the whole set. Some fields under More Options are text entries, while others will let you select one from the drop-down menus. As soon as you drop files, they will start uploading to your SoundCloud account.
Scup
You may also configure these parameters for individual tracks by clicking the arrow next to each file’s name in the list. This will expand the view, bringing the same fields for individual tracks. Scup will even let you add album art to your set, making it ready for publishing in almost every sense. The bottom panel of the application lets you control settings such as sharing, making originals downloadable and allowing 128 kbps streaming.
Scup_Files
As with all Adobe AIR applications, Scup has a really pleasing outlook. The application is quite user-friendly, and since it is based on an open platform, it will work on Windows, Mac OS X and Linux, provided you have Adobe AIR installed. Testing was done on Windows 7 Ultimate, 64-bit version.
Download Scup

Log In To Multiple Skype Accounts On PC Startup With Skype Launcher

Skype provides its users with one of the best audio call, video call and instant messaging services. Skype’s usefulness is not limited only to communication but also offers a host of other functions. You can also use Skype for screen sharing and sending files to your contacts (even though I myself hate to use the Skype file transfer service). Apart from these built-in features, plugins and third party applications also extend the utility of Skype to greater levels by providing users with tools and extensions that integrate with Skype and perform various functions. Do check out some of the awesome features and tools to supercharge your Skype experience. These extended capabilities make Skype a utility not only for using in homes and personal interaction, but also for educational and professional purposes. Skype Launcher is an application for Windows that allows you to log in with multiple Skype accounts at a time on one PC.
The application’s usage is pretty simple. Just download the application and add the Skype addresses that you require to login on system startup. In the Skype Launcher Configuration window (accessible from the start menu folder of Skype Launcher), you may add multiple accounts and specify settings, such as Delay Launch on Boot, Disable Notice Autologin, Use Alternative Login, Wait For Login Complete, Force Workaround For Skype, Double Timeouts etc.
Skype Launcher - Autologins
When you run the application, Skype Launcher will login all your accounts one by one with the specified delay. You will receive notifications on your screen for every account  being logged in.
Program Manager_2012-02-09_15-18-52
Skype Launcher works on all 32-bit and 64-bit version of Windows XP, Windows Vista and Windows 7.
Download Skype Launcher

How To Manage Your Startup Programs Easily, An Easy Way To Increase System Performance

The best way to start your computer faster and improve the overall system performance is to reduce the number of programs that load when Windows start. Reducing the number of startup programs can help you in loading the Windows faster, saving RAM, and faster loading performance. Many people will be familiar with the way that requires installing and running Windows Defender, going to Tools > Software Explorer and from category selecting Startup Programs. This method works for many people but is not very effective.

Many people do not have Windows Defender and many don’t want to install it either. Well you don’t even need too. Follow these basic steps for managing the startup programs.
For Windows XP: Click Start and then Run, in the dialog box type msconfig and click OK.
For Windows Vista: Click Start and in the search bar type Run and in the dialog box type msconfig and click OK. The quickest way is to simply type msconfig in the search bar and press Enter.
image
Now in the System Configuration click on the Startup tab and you will see the list of startup programs as shown below.
image
You can uncheck any program that you feel you don’t need on Startup. These programs that are listed here are installed on your computer and remain installed. So do not worry, even clicking Disable all button will not screw up your computer. It does not remove the program but only disables it from loading on Startup.
After unchecking the programs that you don’t need, click OK. Now it will ask you for the computer to be restarted. Restart your computer and you will see your speed while logging in to be faster than before.

Desktop Context Menu Customizer: Add Apps To Windows Context Menu & Create Cascade Menus

Desktop Context Menu Customizer is a portable application to add frequently-used application’s shortcuts as well as Windows native utilities and Control Panel applets to
to Windows right-click context menu, so that you can quickly open them without having to manually navigate through different locations.  It lets you add items to both normal view and extended view (accessible via Shift+right-click) of the context menu. Furthermore, you have the option to create and edit cascading context menus, add specific items to either desktop right-click menu or Windows Explorer right-click menu and change the positions of items in context menus.
To begin, launch the application and head over to Desktop Default Single Menu tab to add applications’ shortcuts to context menu.  From Add Program tab, specify the application source path and select its Position in context menu. Now, give it an appropriate name and hit Apply Changes to add item to context menu. You can add as many application’s shortcuts to context menu as you want in similar fashion. to  If you check Extended Menu option, the item will be added to the extended context menu. The Advanced tab lets you add system locations like Internet Options, System Properties, User Accounts, Programs & Features, Task Manager etc., to context menu.

In order to add a cascade menu to the right-click menu, switch to Desktop Cascade Menu tab and then select Create A New Cascade Menu tab from Add New Cascade Menu window.Now create a new cascade menu and then head over to Add A Program To Cascade Menu to specify the application executable source path. Once done, click Apply Changes. Similarly, you can add multiple items in selected cascade menu.  The next three tabs let you re-order, edit and remove cascade menu items.


The cascade menu will be created in the right-click context menu.

The cascade menu option is available only for desktop at the moment, and we hope that developer will include this option for Windows Explorer context menu in next release. Desktop Context Menu Customizer works on Windows 7.
Download Desktop Context Menu Customizer

Easily Create & Manage Cascading Context Menus With Argument Support

The right click context menu allows us to greatly reduce the number of clicks by providing us with shortcuts to our favorite and most used applications. This decreases the amount of time spent on navigating to and then opening programs, and increases our productivity. By default, Windows provides you with some basic global as well as format specific options in the right click menu, such as changing view, accessing the properties and copy/cut/paste for files and folders. Previously, we have covered some very good context menu editors, such as Context Menu Editor, feature specific context menu editors like New menu Editor (only for adding and removing objects from the New context menu), and additional menus in the context menu, including Moo0 RightClicker. Today, we are adding another portable application to the list of context menu editors called Right Click Cascading Menu Creator, which provides users with the simplest method to add and manage cascading menus to the right click context menu.
The application allows you to add files, folders and application shortcuts to the context menu with cascading. You can add all the shortcuts to the same menu, or create multiple menus depending on your requirement. Moreover, you can use custom icons for each cascading menu and application shortcut added through the application.
The interface has File and Tools menus at the top, while Add Cascading Menu, Edit Menu, Remove Menu, Add File, Add Folder, Edit Item and Remove Item buttons and a drop down menu to toggle the Mode between Simple and Advanced is available below it. To add a cascading menu, select Add Cascading Menu from the top, enter a name, and click Add Menu.
Right Click Cascading Menu Shortcuts Creator
To add a shortcut to a pre-existing cascading menu, right click it and select Add file from the menu. Note that if Simple mode is selected, you can add shortcuts just by specifying their name and path, where as the Advanced mode allows you to also add Arguments to the shortcut.
Add File Shortcut
All the added cascading menus and their corresponding items are instantly accessible from the right-click menu.
Program Manager_2012-02-09_14-40-11
Right Click Cascading Menu Creator is available as both installable and portable versions, and works on Windows 7.
Download Right Click Cascading Menu Creator

Screen Capture + Print: Save, Print & Copy Screenshots To Clipboard

We have covered a lot of useful screenshot taking tools, such as GreenShot and Shotty, which let you take screenshots of your complete desktop screen, a particular window or a select region. Today, we bring to you a lightweight and portable screenshot tool, called Screen Capture + Print, that provides you with three options after taking a screenshot; Print, Copy to Clipboard, and Save to File. The application is capable of capturing selected region, full screen, a single window or content inside a window. It supports capturing desktops with multi-monitor display, as well as transparent windows and regions. The image can be copied to clipboard and used directly from it, without having to save it in a file first. The saved area can be saved to a file in JPG, PNG, BMP, GIF and TIF formats. More about Screen Capture + Print after the break.
The application runs in the system tray, and different screenshot capturing methods can be accessed by right-clicking its icon. It provides you with Capture Rectangle (region capture), Capture Desktop (complete desktop) and Capture Window (a window or its content) screenshot methods to choose from.
Screen Capture   Print
Once you take a screenshot, a dialog box pops up, allowing you to choose to copy the image to clipboard, directly print it, or save it to a file. The image format chosen while saving the screenshot will be set as default for the subsequent screenshots.
Screen Capture   Print options
The Capture Desktop screenshot method has full support for desktops with multi-monitor displays.
Capture Desktop Multi
Even though the application works without any glitches and includes all the necessary options, the lack of hot key support is a huge draw back of Screen Capture + Print. We hope that the developer includes hot key support in the next release. It has a memory footprint of around 13 MB, and works on all version of Windows.
Download Screen Capture + Print

Saturday, February 4, 2012

Making Strong Passwords – and Keeping them Safe

Hello there! If you are new here, you might want to subscribe to the RSS feed to receive updates.
SecurityEveryone is totally crazy about security these days – especially computer security. We’ve all got antivirus software, a firewall, spyware scanners, and god knows what else loaded up on our PCs to protect ourselves from the “evils” of a networked world.
Some of us choose to use certain operating systems that we believe are inherently secure, while the reality is quite different. I remember hearing all about how “ultra-secure” OS X Tiger was in comparison to Windows XP. I know a lot of people who believed this, and who even went out of their way to harp on XP and how insecure it was. Well, there have been numerous updates for Tiger and Leopard that were sent out from Apple HQ. Guess what? There were scores of security vulnerabilities in OS X. What really might shock you is that the vulnerabilities in OS X read like a list of XP security holes (see here and here and here). That’s right, just because Apple tells you OS X is safer doesn’t mean that it’s actually true! Go figure!
Of course, there’s also Linux. In some respects, Linux is safer. In others, it’s no different than XP and OS X. Personally, I prefer Ubuntu and Vista at the moment. But the bottom line is that when it comes to security, it’s up to you to keep your data safe. The first and best way you can do that is to create and use strong passwords!

Two of the biggest problems I have seen in the way that most people use computers are:
  • Not using passwords at all
  • Using silly passwords that are easily hacked
First, let’s examine not using a password at all.
In Windows XP, a user account password is not required. Neither is an administrator password. I’m guessing that you might never even have heard of the Administrator account if you’re using XP. If you installed XP yourself, you had the option of setting the Administrator password during installation. If you didn’t, it’s easy enough to fix.
  • Click Start -> Control Panel -> Administrative Tools -> Computer Management
  • In the left-hand pane, click the + next to “Local Users and Groups”
  • Click the “Users” folder
  • In the main pane, right click “Administrator” and choose “Set Password”
  • Set an Administrator password
A shortcut for the first step is to right-click My Computer and select “Manage”. Note that if you’re using Windows XP Home, the process is a bit more involved:
  • Reboot your computer.
  • Hit F8 just after the BIOS bootscreen is displayed. This will bring up the XP boot options menu. Select “Safe Mode” from the list.
  • Click Start -> Control Panel -> Users Accounts
  • Select the “Administrator” account from the list
  • Set/Change the Administrator password
In Vista, you’re already set up. The reason you don’t want a blank Administrator password is because this is one of the primary ways that hackers can do evil things to your computer. No Administrator password is like leaving your doors not only unlocked, but wide open. Anybody can just wander in, and they will wander in because you are basically advertising the fact that you are an easy target.
Alrighty, this brings us around to problem #2: using crappy passwords.
The easiest way to hack most passwords is to try what is known as a dictionary attack. From Tech-FAQ.com:
A dictionary attack consists of trying “every word in the dictionary” as a possible password for an encrypted message.
A dictionary attack is generally more efficient than a brute force attack, because users typically choose poor passwords.
But you’re clever, right? You use “strong” passwords? Guess again:
The first method of improving the success of a dictionary attack is to use a larger dictionary, or more dictionaries. Technical dictionaries and foreign language dictionaries will increase the overall chance of discovering the correct password.
The second method of improving the success of a dictionary attack is to perform string manipulation on the dictionary. For example, the dictionary may have the word “password” in it. Common string manipulation techniques will try the word backwards (drowssap), with common number-letter replacements (p4ssw0rd), or with different capitalization (Password).
Okeydokey. So, how do you make a REALLY strong password?
A good password should be a random combination of letters, numbers, and punctuation marks. The longer, the better. But there is one problem with strong passwords: they can be really hard to remember!
What we need is a good way to make a strong password that seems random, but that actually has a meaning to you in a way that someone who knows you won’t be able to guess your password. Absolutely the #1 BIGGEST mistake that people make is to use a spouse’s birthday, birth year, your dog’s name when you were a kid, etc. Let me be perfectly blunt: passwords like that are UTTER CRAP.
So, how do you make a good password?
It’s easy. First, at the time you are choosing the password, look around you. Say you are in your basement, and there’s a painting on the wall. It reminds you of a trip you took as a child to a big lake. You remember that the name of the boat you took out on the lake was “Minnow”. That’s a good start. But “minnow” is a dictionary word, so you can’t use it. And don’t just reverse it and use “wonnim”. Too easily hacked!
So let’s take “minnow” and work with it. You also see a photograph of an old race car that has the number “23″ on it. Fabulous. You now have “minnow” and “23″. Now, let’s say that thinking about boats and race cars reminded you of a time in high school when you were doing a report on the history of transportation. You worked and worked on your report, only to find that somehow, half your report went missing after you turned it in. You got a 50%. Ouch.
We now have “minnow”, “23″, and “50%”. All these concepts are linked together in your mind through a sort of “stream of consciousness” process, but they don’t mean much to anyone else. But now we have to make the password strong.
  • Wrap “23″ around “minnow”, giving you “2minnow3″
  • Change the spelling of “minnow” to something phonetic that is preferably NOT in a dictionary: “2mynno3″
  • Add “50%” in a creative way (between the double-n): “2myn.5%no3
  • Throw in some capitalization (Y=yes, I DID write the whole report!): “2mYn.5no3″
  • Add some more punctuation for good measure because you were REALLY upset about that “0.5″ on your report: “2mYn.5no3!”
And there you have it: 2mYn.5no3!
It makes no sense to anyone else, but when you think about it, it WILL make sense to you since you are the one who went through the very human process of generating a pseudo-random sequence of characters that is creatively linked together in a way that is unique to you. In fact, I think you might be surprised just how easy it is to remember passwords like this. In letting your mind wander and allowing the creative half of your brain to play with the logical half, you are in fact performing an “exercise” that is strikingly similar to those in certain “whole brain” courses and books. Ya know, the kind of courses that are supposed to make you smarter, improve memory, etc…
Well, in any case, give it a try. You’ll be surprised at the results! Just remember that you shouldn’t follow my example above; let your mind wander and lead you to the perfect, easy-to-remember password!
Alright, now what happens when, like me, you need to store literally hundreds of passwords? Well, that starts to become a rather large load for my poor brain to handle. A tool is needed to store the passwords.
I know some OSes come with a password storage mechanism, but I don’t use them. I don’t trust them. I prefer something open source, which generally will be a bit more secure because everyone is looking at the code trying to make it better. My personal preference is KeePass.
If you visit the KeePass download page, you’ll find versions available for Windows, Mac, Linux, mobile phones, Blackberry, PalmOS, U3 devices, and so on. You’ll also find the source code!
I highly recommend getting the USB stick version. It doesn’t have an installer, which means you can simply unzip it into the folder of choice, and make your own shortcut to the program on your desktop. When you need to take your passwords with you, you just copy that folder over onto a USB stick, and off you go.
The data in KeePass is stored with a good (and selectable) multi-pass encryption scheme that you can actually customize yourself. You can make it ultra-secure, or just mostly-secure. It’s up to you. KeePass is small, light, fast, and updated regularly. Currently, KeePass 2.07 Beta is out. Best of all, it’s completely free and completely open source.
There is a slight learning curve with KeePass, although not what you might expect. It just may take you a few days to explore all its numerous options and to optimize it’s very well-designed database. You can create your own categories in the database, such as “E-mail Passwords”, “Online Stores”, etc. You can store whatever kind of data you want. You can even customize how long username/password data remains on the clipboard before being removed automatically, and the program protects against clipboard spies that may be running on your machine as you are copying/pasting passwords into web pages.
It may sound complicated, but it’s really quite handy and very simple to use once you play around with it for a bit.
So, get out there and make some strong passwords! And if you just have too many passwords to deal with and you need a good place to store them, check out KeePass!

Thursday, February 2, 2012

Repair Microsoft Security Essentials with Fix MSE Utility.

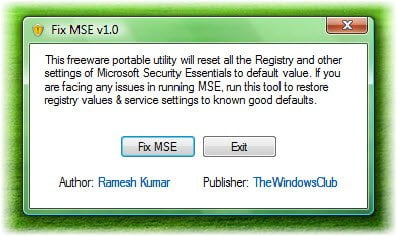
We are pleased to release the Fix MSE Utility v 1.0. This freeware portable utility will reset all the Registry and other settings of Microsoft Security Essentials to default value.
fix mse Repair Microsoft Security Essentials with Fix MSE Utility.
Microsoft Security Essentials, is an excellent freeware antivirus offering from Microsoft. Microsoft Security Essentials runs quietly and efficiently in the background so that you are free to use your Windows-based PC the way you want—without interruptions or long computer wait times.
However, just in case anytime, you find that you are facing any issues in running Microsoft Security Essentials due to any reasons, simply run this utility. This utility will restore all its registry values & service settings to known good defaults, without re-installing MSE. It also re-registers the concerned .dll and .exe files, required to run MSE properly. The utility may take only a moment to run, but rest assured, it does the job! It works on both 32bit and 64bit of Windows Operating Systems.
System Requirements:
Microsoft .Net Framework 2.0
Microsoft Security Essentials 1.0
Supported Operating System:
Windows 7
Windows Vista
Windows XP
download1 Repair Microsoft Security Essentials with Fix MSE Utility.

SMART: A Utility For Tweaking Windows 7, Vista, XP Services Released.

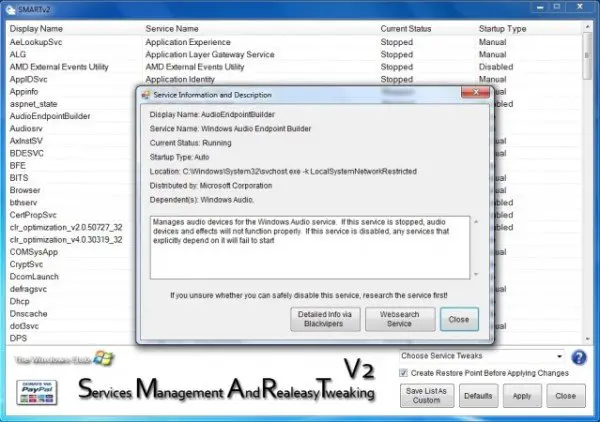
We are pleased to release SMART (Service Management And RealEasy Tweaking) Utility for Windows 7. SMART is a freeware utility which helps you tweak Windows 7 Services, based on the suggested configurations of BlackVipers.
UPDATE 6th March 2010: SMART (Service Management And  RealEasy Tweaking) Utility for Windows 7, Windows Vista and Windows XP has been updated to v 2.0. You can see change log here.
smart tweaker 2 600x422 SMART: A Utility For Tweaking Windows 7, Vista, XP Services Released.
It can simply be downloaded and used as a portable application to customize your Windows  services settings, to meet your requirements. With judicious tweaking, it can make your system faster, as you will be disabling services which you do not require.
Tweaking a system has to be done carefully, and more so in the cases of Services. A  Windows service is a long running executable that performs specific functions and which is designed not to require user intervention. Windows services can be configured to start when the operating system is booted and run in the background as long as Windows is running, or they can be started manually when required.
You can always tweak your services manually individually, but what this utility does is automate the entire process to give you the desired settings. Based on the recommendations of the BlackVipers Service Configuration Guide, the utility offers 3 sets of pre- configured tweaks :
1. Safe
2. Tweaked
3. Advanced or BareBones
The utility has set the Presets to check for Service before applying Tweak. There is also a button to re-set services to Windows Default Settings.
Quick Rundown of Operations:
1. Click a Service to get additional information about it.
2. Double-Click a Service to Automatically Start or Stop it.
3. Right-Click a Service to View and set Start-Up Options (Automatic, Manual & Disabled).
4. Select a Service and Click Open File Location to Locate Service Executable (Does not work on svchost, so if you happen to click a svchost and it opens up your Documents Folder, don’t be alarmed.).
5. Click Refresh To reload the list of Services.
6. Click a preset (Default, Safe, Tweaked, Advanced/BareBones), to set pre-configured Tweaks.
7. The Safe setting is (you guessed it!) safe! Tweak and Advanced settings, are for Advanced users to set their Services.
download1 SMART: A Utility For Tweaking Windows 7, Vista, XP Services Released.
SMART Utility v 2.0, has been developed by our TWC Forum member L.W (MyWayWindows.com). You might also want to check out his UntameDKreationZ Deviant Art gallery.
softpedia SMART: A Utility For Tweaking Windows 7, Vista, XP Services Released.

Repair & Fix Windows 7 & Vista problems with FixWin Utility

We are pleased to release a first-of-its-kind  application for Windows 7 & Vista: FixWin. FixWin is a 529 KB freeware portable application to repair & fix common Windows annoyances & issues. FixWin detects whether you have Windows 7 or Windows Vista installed and accordingly offers you the relevant fixes only.
UPDATE: 19th March 2010. FixWin v 1.2 has been released which includes some minor bugfixes and UI changes. The download links mentioned below point to FixWin v 1.2 now.
fixwin Repair & Fix Windows 7 & Vista problems with FixWin Utility
While there were several tutorials and how-to’s already available on the Internet to deal with such annoyances, FixWin  as a single utility was conceptualized, to fix some of the common annoyances which may be faced by a Windows user.
Does your Recycle Bin not refresh correctly? Or maybe you find that for some reason your right click context menu has been disabled in Internet Explorer! Or perhaps things are not fine with your Windows Media Center and you need to flush & rebuild Windows Media Center database! Maybe you opted to be not-warned while deleting Sticky Notes and you now want the warning dialog box back! Or then perhaps, post a malware attack you find that your task manage or cmd or your Registry Editor has been disabled! Fixes for these and many more such common Windows problems are being offered here.
The solutions to repair and fix 50 common Windows annoyances, issues & problems have been categorized under 5 tabs, viz : Windows Explorer, Internet & Connectivity, Windows Media, System Tools & Misc Additional Fixes.
50 problems … 1 solution … FixWin is the Windows Doctor all have been waiting for! smile Repair & Fix Windows 7 & Vista problems with FixWin Utility
To see the screen-shots showing the list of Windows fixes available, click here.
How to use this application:
1. We first suggest that you run the System File Checker Utility. The button provided on the Welcome page, will ‘run sfc /scannow‘ and will check for and replace any corrupted Windows system files. It is expected to take anywhere from 5-10 minutes. If asked to, do reboot.
2. Next we insist that you create a System Restore Point. The provided button will create one, called Safe Point. We always recommend that you create one before making any changes to your system. Should you wish or need too, you can always go back to this Safe Point.
3. Having done that, apply at most one fix at a time and restart your computer. Please check if things are to your satisfaction; and if not, you have the option of restoring back immediately.
Read & watch what Fox8Live News has to say about The Windows Club & FixWin HERE.
download1 Repair & Fix Windows 7 & Vista problems with FixWin Utility
FixWin Utility v 1.2 has been developed my MVP colleague Ramesh Kumar, for The Windows Club.
It has been tested on Windows 7 & Vista, 32-bit and 64-bit versions. However, FixWin may fail to run if you have modified Windows 7 or Vista Image using third party app like vLite etc, as it may miss some core components required for FixWin to run and thus cause of failure.
brothersoft download Repair & Fix Windows 7 & Vista problems with FixWin Utility
softpedia Repair & Fix Windows 7 & Vista problems with FixWin Utility
majorgeeks1 Repair & Fix Windows 7 & Vista problems with FixWin Utility
zdnet Repair & Fix Windows 7 & Vista problems with FixWin Utility

Send voice email messages to anyone with an e-mail address easily

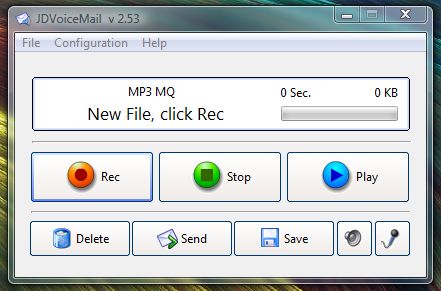
If you are lazy and don’t like typing your emails, then this tool might be just what you were looking for! With JDVoiceMail you can send voice-email messages easily to anyone with an email address.
Freeware JDVoiceMail generates compressed .wav or .mp3 files after reducing them from 16 to 10 times the size of the original voice files.  The recipient doesn’t need any special software to listen your messages. By just double-clicking on the attached voice file, the recipient can listen to it using the default Windows audio player.  You can send the voice file automatically with your favorite pop3 email client or save it in a hard disk folder for use with your web-based email account.
voicemail Send voice email messages to anyone with an e mail address easily
Features:
Works with the Windows® bundled ACM codecs (Present in all 32 bits windows versions).
You can select the codec of the output voice file.
Only 32 KB for a 30 second voice message with the DSP True Speech® Codec.
Only 50 KB for a 30 second voice message with the GSM 6.10® Codec
Only 30 KB for a 30 second voice message with the Lame MP3® Encoder. With the MP3 format, Linux, Mac, Pocket PC and Palm users can listen your messages too.
Simple, minimalist and intuitive graphic interface.
Send the voice file automatically with your favorite pop3 email client or save it in a hard disk folder for use with your web-based email account.
Compatible with all MAPI e-mails clients
Easily share JDVoiceMail with your friends Its less than 1.50 MB for the installer file.
JDVoiceMail is 100% freeware, no ads, no limitations, no adware, no banners, no spyware and very easy to use.

KeyLemon: A Free Face Recognition Software for Windows

We have already discussed and listed some of the best free online password managers and desktop password managers. While these programs and services help you remember your passwords once you are logged it, if you also want to ‘do away with’ remembering your password to your Windows computer, you can use a face recognition software. KeyLemon is free face recognition software that helps you replace your Windows login password with your face.
KeyLemon KeyLemon: A Free Face Recognition Software for Windows

Free Face Recognition Software

KeyLemon uses face recognition feature, instead of requiring you to type your username and password thereby providing a simple solution to log on to your personal Windows account.
keylemon lemonlock pres KeyLemon: A Free Face Recognition Software for Windows
One of the main features of the application is ‘Hijackers Tacking’. The feature helps you to retrieve information about who tried to access your computer in your absence or when you were away.
KeyLemon also works as a password manager for many of the popular websites. When you connect to say Facebook, Twitter or LinkedIn, KeyLemon automatically logs you into your account by using your face – no matter if your computer has multiple users. When you leave the computer, it automatically locks your computer once you are away and unlocks it only when you are back – using your face.
KeyLemon will also let you know:
  • Who was present in front of your computer before automatic windows lock
  • Who typed a wrong password when computer was locked
The program has the ability to replace the standard Windows logon screen with a KeyLemon login screen that connects to your webcam. The latest version KeyLemon 2.5 for Windows comes with two main new features:
  • Multiple face model management – Allows you to add new face models to improve recognition in different lightning environment since face recognition is sensitive to light conditions. The recognition accuracy can be set between ‘low’, ‘medium’ and ‘high’.KeyLemon profile management 400x290 KeyLemon: A Free Face Recognition Software for Windows
  • Anti-spoofing check for login - Adds more security if someone misuses a picture of you to log into the system. It performs detection in parallel with the recognition. After the process is validated, a blue eye icon appears in the top right corner of the video stream. Blink your eyes once to log into your session. To activate the feature, a user needs to check the ‘anti-spoofing check for login’ option in the general tab of KeyLemon Control Center.KeyLemon anti spoofing1 400x290 KeyLemon: A Free Face Recognition Software for Windows
KeyLemon allows Firefox users to access Facebook, LinkedIn and Twitter accounts more easily.
If you want to try it out, you can visit the KeyLemon website to download it free. It is available in 3 versions: Gold (Paid), Bronze(Paid) and Basic (Free) versions. The basic free version has two features – Login with face recognition and Track your face evolution.

Ares 2.1.8.3042

 http://www.downloadaresfree.org/wp-content/uploads/2011/11/ares-galaxy-logo.jpg
Ares is a free open source file sharing program that enables users to share any digital file including images, audio, video, software, documents, etc. You may now easily publish your files through the Ares peer to peer network. As a member of the virtual community, you can search and download just about any file shared by other users. Latest versions support BitTorrent protocol and Shoutcast radio stations. With Ares you can also join chat rooms or host your channel and meet new friends.
Ares automatically finds more sources and downloads files from many users at once. This can increase remarkably the speed of your downloads. Ares works behind firewalls and requires zero configuration. You can preview files while their download is in progress and organize a playlist made of your favourites. Ares' player supports Shoutcast internet radio. You can host your chat room and join other available channels. Creating a chat channel has never been easier, now you can chat and meet new friends while you download files. Your shared files are organized into categories in a library section. You can sort your files by type, category and easily change your share settings. An handy quick-search feature locates your files by typing a keyword.

Ares is a free software. Its source code is available for free. Anyone who wants it can download Ares' source, add their own features and come up with their own version.

Download: Ares 2.1.8.3042 | 2.9 MB (Open Source)
Screenshots: >>Click Here<<
View: Homepage

Maxthon 3.3.4.1200 Beta

http://t3.gstatic.com/images?q=tbn:ANd9GcSMfWa2P5S313jf1OM8U7mCdLQiXIifPCupq6PMDk-jknJrV5mFcg
Maxthon Internet Browser software is a powerful tabbed browser with a highly customizable interface. It is now based on Webkit, but still offers use of the Internet Explorer browser engine as an option which means that what works in the IE browser will work the same in Maxthon tabbed browser but with many additional efficient features:
The Ultimate Out-of-box Experience
  • Easy to use and powerful straight out of the box
  • Download now for free, forever!
Maxthon Works the Way You Want It To
  • Swap, add, move, remove, and change Maxthon's tool bars, icons, menus, colors, skins, and layouts until it looks the way you would have designed it.
  • Don't like menus? Use hot keys, word aliases, toolbars, or mouse gestures - it's all up to you.
  • Pick from more than 1,400 plug-ins that make Maxthon the do-all of browsers.
  • Remote conferencing, screen capture, electronic passports, and automatic password inlcuded, free.
Security.
  • Maxthon is 100% free of viruses, spyware, adware & any kind of malware.
  • The built-in Ad Hunter blocks harmful, or just irritating ads, images and pages.
  • Filter packs screen out offensive and irritating Web pages.
Download: Maxthon 3.3.4.1200 Beta | Portable | 24.3 MB (Freeware)
View: Maxthon 3 Website | Changelog

Easy CD-DA Extractor 16.0.0.1

http://www.poikosoft.com/img/scrshot_1.png
Easy CD-DA Extractor is the most comprehensive multi format audio converter and is extremely easy to use. Rips audio CDs, converts audio files, and burns CDs & DVDs. All popular audio formats are supported. Includes editing of metadata, and copying of CDs & DVDs. Uses GD3, MusicBrainz, freedb, and Amazon metadata services for retrieving metadata and cover art.
Easy CD-DA Extractor is designed to provide best user experience with its excellent user interface and ultimate audio quality. It includes only the audio components and codecs that provide the best audio quality. Easy CD-DA Extractor includes Dolby Pulse AAC / HE AAC encoder. Dolby Pulse combines all the benefits of AAC and HE AAC v1/v2 efficiency and further improves on the audio performance by adding exclusive Dolby features. Easy CD-DA Extractor uses ReplayGain to calculate the loudness of audio files. It allows automatic loudness leveling of music on playback.

Unique features of Easy CD-DA Extractor:
  • Intuitive and easy-to-use interface
  • Best audio codecs out of the box for best audio quality
  • Exact and reliable CD ripping with error detection and two-pass verification of audio
  • Extremely high-performance ripping and converting that takes advantage of the multimedia features of processors
  • Multi-core audio converter that allows parallel audio conversion with up to 8 parallel converters
  • ReplayGain for automatic loudness leveling on playback
Supported audio formats include:
Dolby Pulse AAC / HE AAC, Apple Lossless, AIFF, Monkey's Audio, FLAC, MP3, Ogg Vorbis, WAV, Windows Media Audio, and WavPack.
Download: Easy CD-DA Extractor 16.0.0.1 | 10.1 MB (Shareware)
View: Easy CD-DA Extractor Website | Release Notes

Toolwiz Care 1.0.0.502

http://static.toolwiz.com/btows/SystemCareBox2.png
Toolwiz Care is a collection of system utilities and optimization tools designed to clean, check, optimize and tweak your computer. The program offers a well designed interface that organizes the more than 40 tools into 6 different categories.
Among other things, Toolwize Care includes a Registry Cleaner, Disk Analyzer, Startup Optimizer, Boot Time Analyzer, Process Manager, Privacy Cleaner and most other tools commonly found in similar utility suites.
In addition to the main featured, Toolwiz Care includes more than a dozen small tools that can perform a variety of functions like generating password, recovering recently deleted files, finding duplicates, shred files and more. Although Toolwiz Care looks impressive and offers a quantity of features, most of the functionality, especially the "Tools" collection, is fairly basic and without documentation.
What's new in this version:
  • Added one click backup
  • Added language translation
  • Fixed multi-language issue
Download: Toolwiz Care 1.0.0.502 | 3.9 MB (Freeware)
News Source: SnapFiles.com
View: Toolwiz Care Website | Screenshots

Wednesday, February 1, 2012

View Detailed System, Windows, Hardware, Network Related Information With SIV


System Information Viewer (SIV) holds an huge array of system information, catering to generic hardware resources, complete Windows information, graphics (VGA, GPU), USB ports and plugged-in USB devices, Network related information, Disk volumes, Wi-Fi specific ports (SSiDs, TCP information, Bluetooth), PCI Buses and lot more.
Previously we have covered similar tools like, Speccy and SIW (System Information for Windows), this application is more advanced in terms of system elements’ details it brings with an extensive information about all the connected peripherals, Bus slots, and other devices related directly with system.

It displays all the generic system information including CPU(s) clock speed, utilisation, volts consumption, temperature, etc., right up front on the main interface. It is designed for power users, since most of the information it brings is a bit hard to understand for novices.
In the bottom lane you will see multiple system elements’ pull down menus. From drop-down list, you can navigate to the information dialog of the specified element. Like from Windows pull-down menu, you can view information like; File Cache, Paging, Job pools, DNS names, DLL by address and by name, Windows groups, Processes, Services, and more.
SIV
From USB Bus menu, you can open separate information windows for;  PCI Bus, Device IDs, Interfaces, Device trees, PNP and PCI devices, FireWire, etc. Similarly under Network all the network specific elements and operations are present, such as; Domains, Users, Net Card, Servers, Filters, etc. Under each informational window, there’re all more related information bundled in drop-down list. For instance, under Physical memory window, you can view detailed information pertaining to Port, Memory, Express, and Complex addresses.
memory
The application displays almost everything which your system includes, one pre-requisite is that you need to know which sub-elements, operations or functionality falls under which system element’s category. It runs on all versions of Windows, testing was done on Windows 7 x86 system.
Download SIV (System Information Viewer)

Make Free Voice Calls To Your Twitter Friends Using OnSay For iPhone


Twitter is a pretty open platform for social networking as compared to Facebook, so if you want to get in touch with someone over the micro-blogging service, direct messages are the only private option you have got. OnSay is an app which brings a whole new dimension to Twitter. Using this iOS app, you can make voice calls to any “tweep” using this app, without having to go through any complicated procedure. Read on to know all about this amazingly useful app.

OnSay OnSay Settings
OnSay has a pretty unique interface, but some might find it a bit too minimalistic for their liking. The best thing about the service is that you don’t have to sign up for a new account in order to use it. Just log in with your Twitter credentials, and you will be able to connect with any of your friends using the app. As the service is rather new, it is likely that you will have to invite your friends to join OnSay. This can be done by posting a tweet after adding a tag of anyone’s name, from within the app. To avoid problems, the app defines a friend as a person who you are following and are being followed by. Once a friend is using OnSay too, he or she will show up in the app’s Friends list.
OnSay Call Menu OnSay Call
To make a call you just have to tap the OnSay icon next to your friend’s name, or by using the Call button. OnSay maintains call records for all users in the Recent Calls section. You can Block a user from calling you via OnSay as well by going to their app profile page. The voice quality was pretty good in our experience, and the call function worked pretty smoothly. However, if the app is closed, no notification was displayed for incoming calls (no push notification support, we assume), which is a huge bummer, and something we hope the developers would address in future updates.
OnSay is a free app, and available for both iOS and Android.
Download OnSay (iOS)
Download OnSay (Android)