Showing posts with label Tutorials. Show all posts

Wednesday, April 4, 2012

Become a Linux Terminal Power User With These 8 Tricks

bash tricks header
There’s more to using the Linux terminal than just typing commands into it. Learn these basic tricks and you’ll be well on your way to mastering the Bash shell, used by default on most Linux distributions.
This one’s for the less experienced users – I’m sure that many of you advanced users out there already know all these tricks. Still, take a look – maybe there’s something you missed along the way.

Tab Completion

Tab completion is an essential trick. It’s a great time saver and it’s also useful if you’re not sure of a file or command’s exact name.
For example, let’s say you have a file named “really long file name” in the current directory and you want to delete it. You could type the entire file name, but you’d have to escape the space characters properly (in other words, add the \ character before each space) and might make a mistake. If you type rm r and press Tab, Bash will automatically fill the file’s name in for you.
Of course, if you have multiple files in the current directory that begin with the letter r, Bash won’t know which one you want. Let’s say you have another file named “really very long file name” in the current directory. When you hit Tab, Bash will fill in the “really\ “ part, since the files both begin with that. After it does, press Tab again and you’ll see a list of matching file names.

Continue typing your desired file name and press Tab. In this case, we can type an “l” and press Tab again and Bash will fill in our desired file name.
This also works with commands. Not sure what command you want, but know it begins with “gnome”? Type “gnome” and press Tab to see a list.

Pipes

Pipes allow you to send the output of a command to another command. In the UNIX philosophy, each program is a small utility that do one thing well. For example, the ls command lists the files in the current directory and the grep command searches its input for a specified term.
Combine these with pipes (the | character) and you can search for a file in the current directory. The following command searches for the word “word”:
ls | grep word

Wild Cards

The * character – that is, the asterisk – is a wild card that can match anything. For example, if we wanted to delete both “really long file name” and “really very long file name” from the current directory, we could run the following command:
rm really*name
This command deletes all files with file names beginning with “really” and ending with “name.” If you ran rm * instead, you’d delete every file in the current directory, so be careful.

Output Redirection

The > character redirects a command’s output to a file instead of another command. For example, the following line runs the ls command to list the files in the current directory and, instead of printing that list to the terminal, it prints the list to a file named “file1” in the current directory:
ls > file1

Command History

Bash remembers a history of the commands you type into it. You can use the up and down arrow keys to scroll through commands you’ve recently used. The history command prints a list of these commands, so you can pipe it to grep to search for commands you’ve used recently. There are many other tricks you can use with Bash history, too.

~, . & ..

The ~ character – also known as the tilde – represents the current user’s home directory. So, instead of typing cd /home/name to go to your home directory, you can type cd ~ instead. This also works with relative paths – cd ~/Desktop would switch to the current user’s desktop.
Similarly, the . represents the current directory and the .. represents the directory above the current directory. So, cd .. goes up a directory. These also work with relative paths – if you’re in your Desktop folder and want to go to the Documents folder, which is in the same directory as the Documents folder, you can use the cd ../Documents command.

Run a Command in the Background

By default, Bash executes every command you run in the current terminal. That’s normally fine, but what if you want to launch an application and continue using the terminal? If you type firefox to launch Firefox, Firefox will take over your terminal and display error messages and other output until you close it. Add the & operator to the end of the command to have Bash execute the program in the background:
firefox &

Conditional Execution

You can also have Bash run two commands, one after another. The second command will only execute if the first command completed successfully. To do this, put both commands on the same line, separated by a &&, or double ampersand.
For example, the sleep command takes a value in seconds, counts down, and completes successfully. It’s useless alone, but you can use it to run another command after a delay. The following command will wait five seconds, then launch the gnome-screenshot tool:
sleep 5 && gnome-screenshot

Do you have any more tricks to share? Leave a comment and help your fellow readers!
Thursday, February 2, 2012

Install Windows 8 : Screen shot Tutorial

In this article I’ll show you how to install Windows 8 DP on your Computer. Windows 8 Developers Edition is a pre-beta from Microsoft for testing and development purpose. It not recommended installing it on a production computer.
If you’re planning to set up Dual Boot, make sure you create a drive more than 20 GB as primary partition. If you’re going for a Clean Install  of Windows 8, then backup your files, then format your C drive and install it fresh.

How to install Windows 8

Step 1:
Boot your computer with the Windows 8 installation media
Step 2:
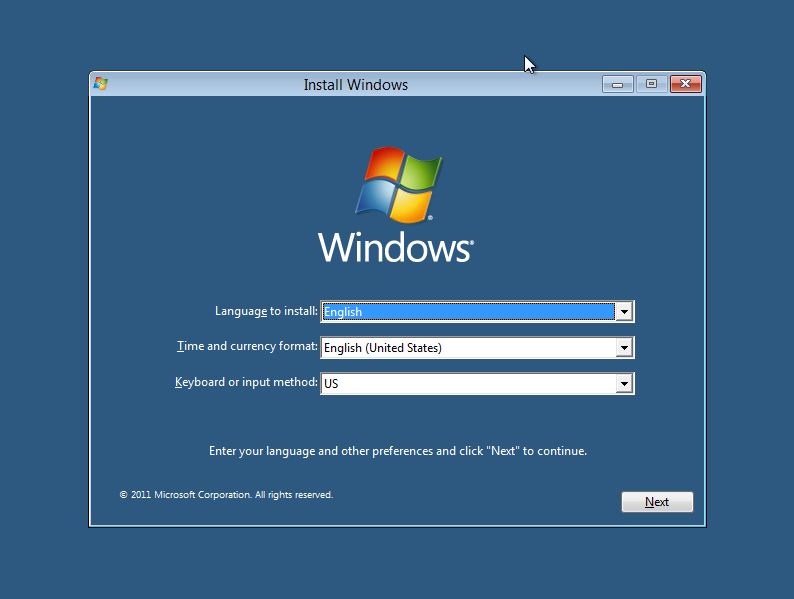
It might take few minutes to load the files, and then it will take you to the installation screen. Select the appropriate option and click next.
15 Install Windows 8 : Screen shot Tutorial
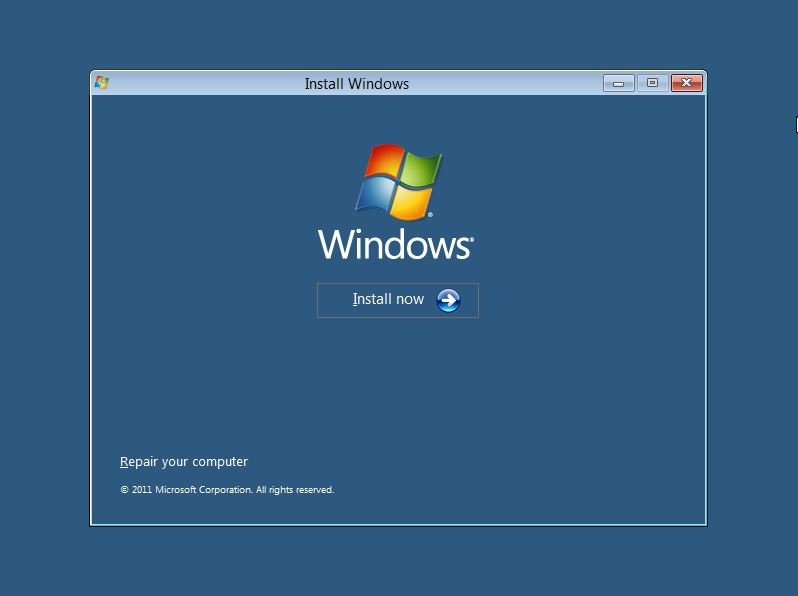
Step 3:
Now click on “Install Now” to proceed
21 Install Windows 8 : Screen shot Tutorial
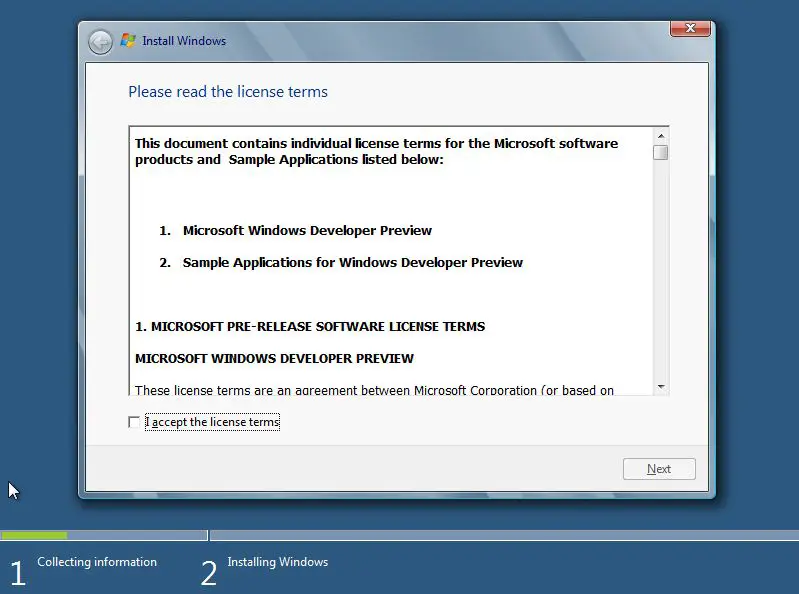
Step 4:
Accept the terms and conditions and then click “Next”.
31 Install Windows 8 : Screen shot Tutorial

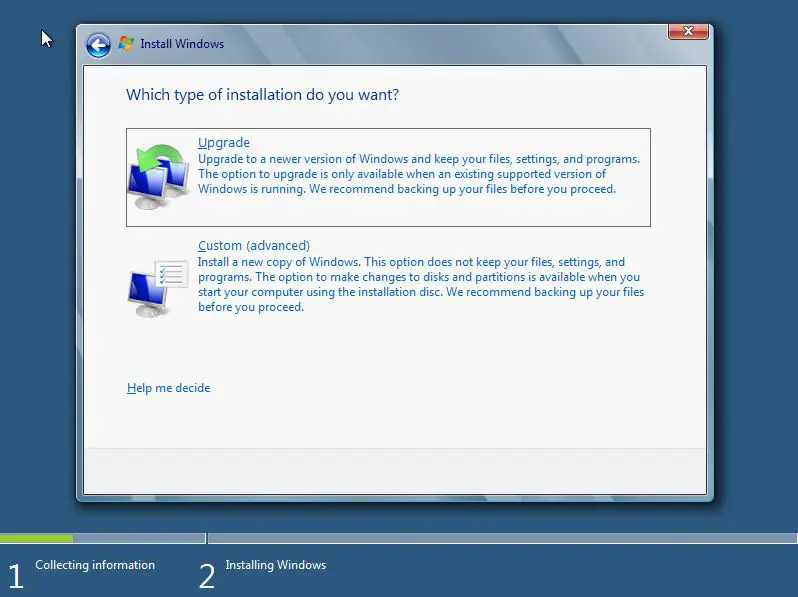
Step 5:
Here you can choose if you want to upgrade your Windows to Windows 8 Developers Edition or you want to do a Clean Install. Choose customize to do a Clean Install.
41 Install Windows 8 : Screen shot Tutorial
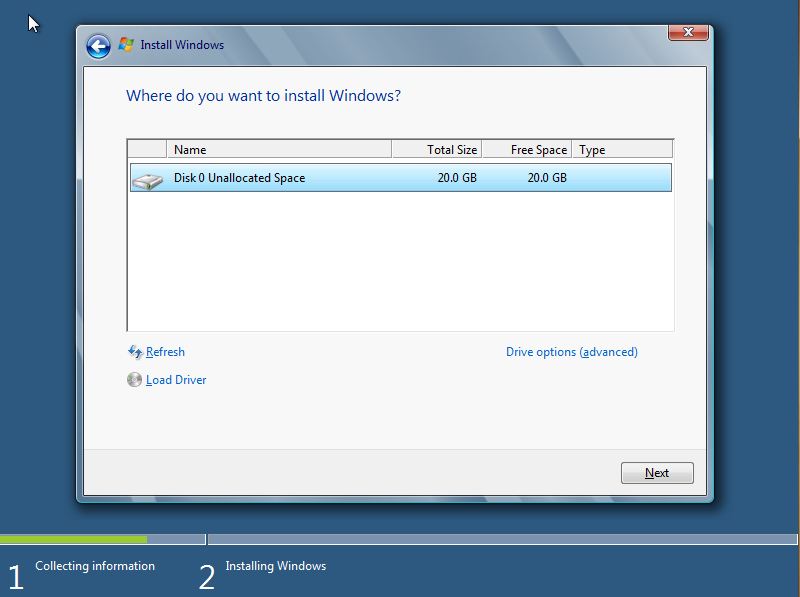
Step 6:
In this screen you can choose which drive you want to install, here we have the ability to manage the disk, format, create partition etc. If you’re planning to setup Dual boot then you can choose a different drive. Once you configured the drive click “Next”
51 Install Windows 8 : Screen shot Tutorial
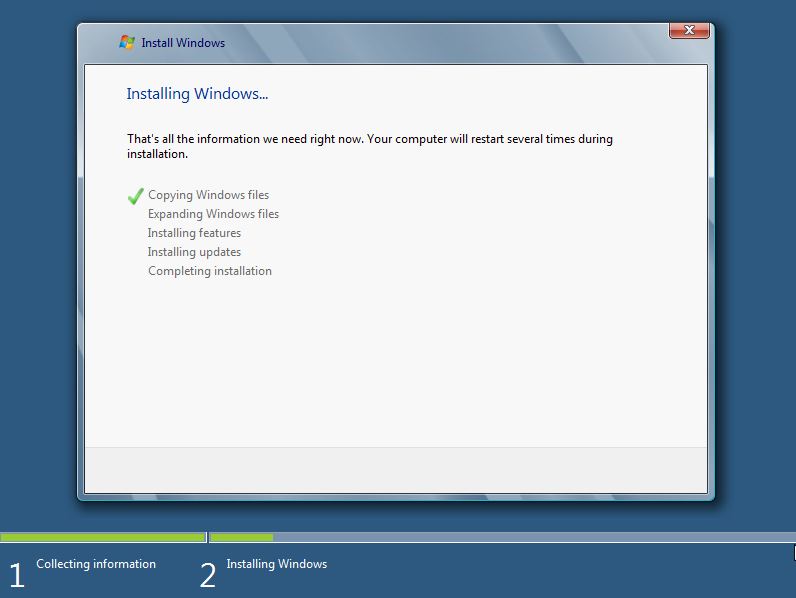
Step 7:
That’s it now it will start the installation process wait until it complete which take 10 mins to 1 hour depending on your Hardware configuration.
61 Install Windows 8 : Screen shot Tutorial
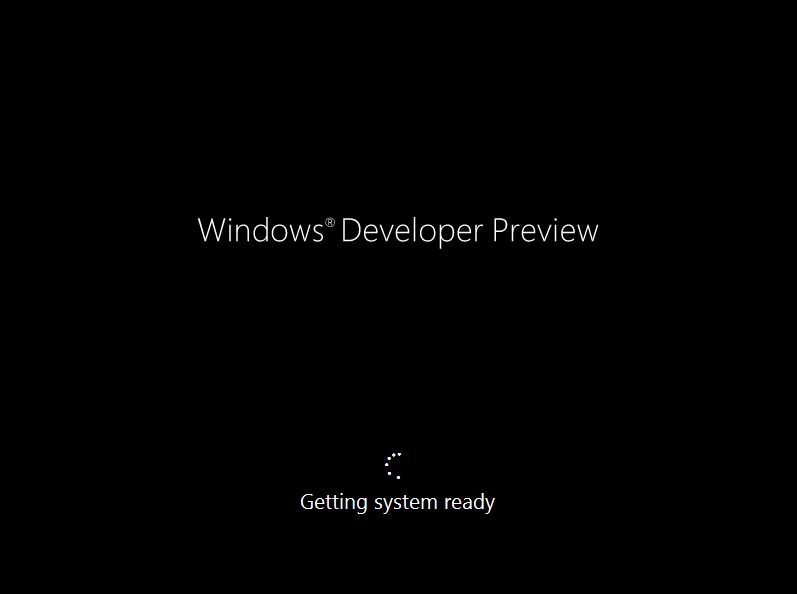
Step 8:
Once it’s complete the installation you’re machine will reboot and it will prepare your settings. So please wait.
71 Install Windows 8 : Screen shot Tutorial
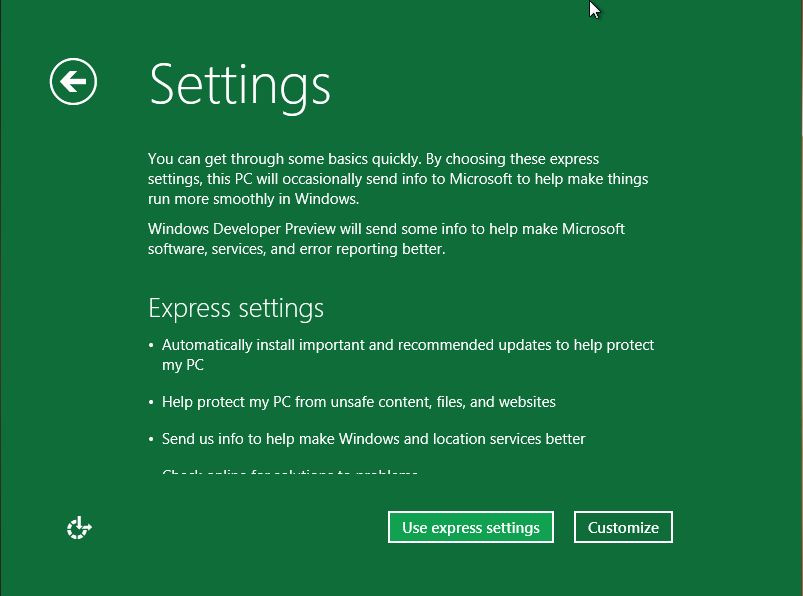
Step 9:
Now it will take you to personalize you desktop settings. I would recommend “Express settings” that screen it will show you what all the express settings does.
91 Install Windows 8 : Screen shot Tutorial
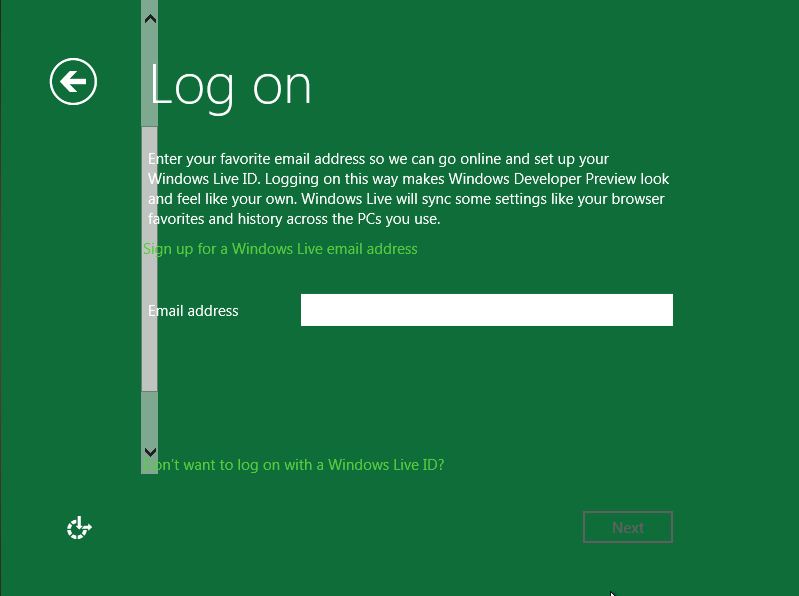
Step 10:
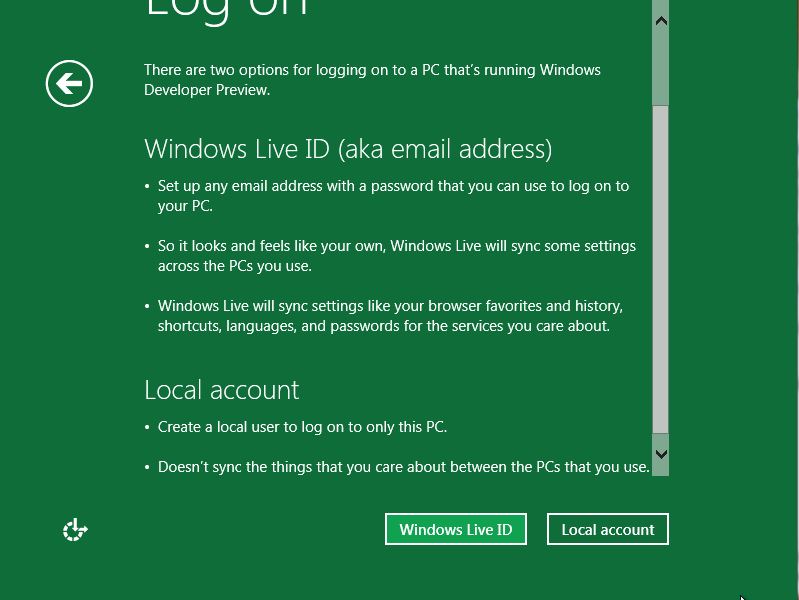
Unlike other operating systems, on Windows 8 you can login using your Windows Live account. So you can enter your Windows Live account information.
101 Install Windows 8 : Screen shot Tutorial
If you don’t want to use that login Method then click on “I don’t want to log in with a Windows Live ID”
111 Install Windows 8 : Screen shot Tutorial
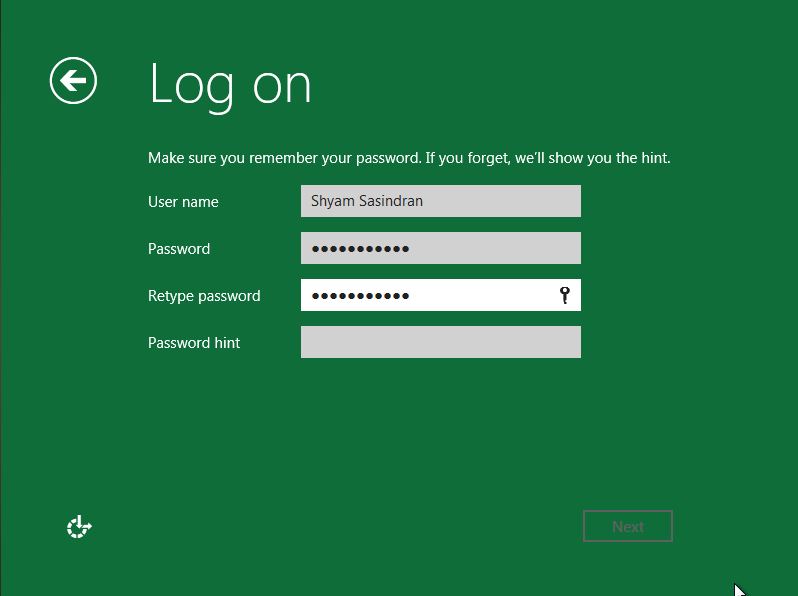
You can chose “Local account” to create a Username and Password to login to your Windows.
121 Install Windows 8 : Screen shot Tutorial
Once you enter all the information click “Next”
Step 11:
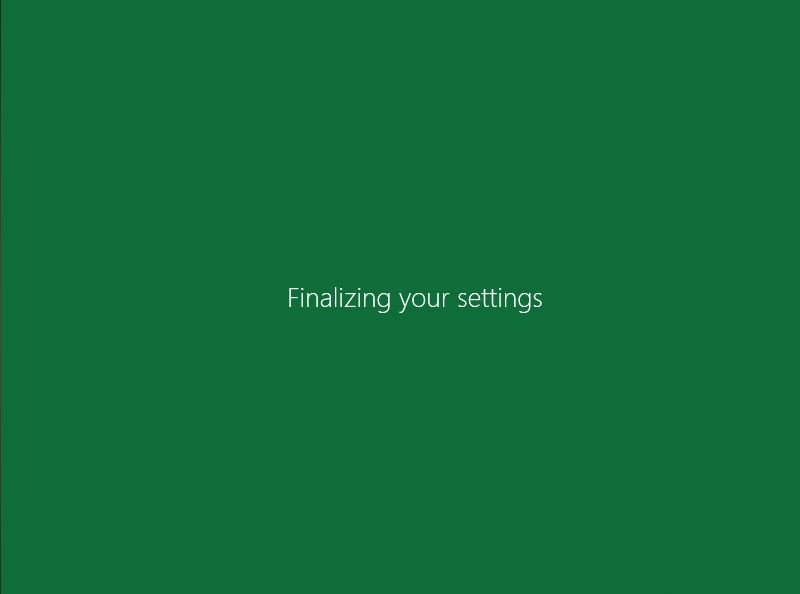
Now the Windows will configure your settings
131 Install Windows 8 : Screen shot Tutorial
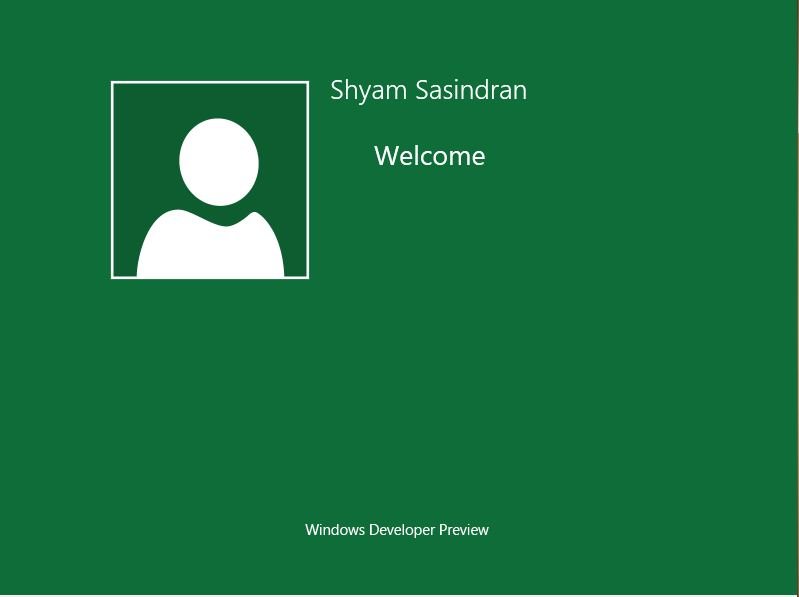
141 Install Windows 8 : Screen shot Tutorial
Once everything is setup it will take you to your desktop.
151 Install Windows 8 : Screen shot Tutorial
Congratulations! You have now successfully installed Windows 8 on your computer.

Monday, January 30, 2012

Red Hat 6 Installation Guide – RHEL 6 Install Screenshots

https://blogger.googleusercontent.com/img/b/R29vZ2xl/AVvXsEhznMYYy-MMjW1llU56uxLwAX99eDPZUjciqtnzXTOLbHV-3DDnjatWSWYlgdZRZpdWlYky4CPED8VKb4QMDAVPTCl6Vr6XmlxrXDWbwP_cnby_pdNooVRWT3Qjx6z_VDxT2QoJdUNIkyDp/s1600/redhat-logo.jpg
This is Red Hat 6 RHEL (Red Hat Enterprise Linux) installation guide, step-by-step walkthrough with screenshots. Current version of Red Hat 6 is Beta, but also this RHEL 6 Beta version looks very stable and good OS, so that’s why I decided to write this RHEL 6 Installation guide.

The Red Hat Enterprise Linux 6 Beta is available on the following architectures:

  • i386
  • AMD64/Intel64
  • System z
  • IBM Power (64-bit)
Download Red Hat 6 Beta DVD images here.

Some of the many improvements and new features that are included in Red Hat Enterprise Linux 6

  • Power management – tickless kernel and improvements through the application stack to reduce wakeups, power consumption measurement by Powertop, Power Management (ASPM, ALPM), and adaptive system tuning by Tuned, all enhance more efficient system power usage.
  • Next generation networking – comprehensive IPv6 support (NFS 4, CIFS, mobile support [RFC 3775], ISATAP support), FCoE, iSCSI, and a new and improved mac 802.11 wireless stack.
  • Scalable filesystems – ext4 file system provides support for larger file sizes and significantly reduces repair times over ext3. XFS® is a high-performance file system that supports extremely large files and is optimized for large data transfers.
  • Virtualization – KVM includes performance improvements and new features, sVirt protects the guest and host from unauthorized access, SR-IOV and NPIV deliver high-performance virtual use of physical devices, and libvirt leverages kernel resource management functionality.
  • Enterprise security enhancement – SELinux includes improved ease of use, application sandboxing, and significantly increased coverage of system services, while SSSD provides unified access to identity and authentication services as well as caching for off-line use.
  • Development and runtime support – SystemTap improvements, ABRT is a new framework for simple collection and reporting of bug information, and improvements are made to GCC (version 4.4.3), glibc (version 2.11.1), and GDB (version 7.0.1).
On this guide I use Graphical Installer. There is also Kickstart automated installation method and Text-based Installer available. And I install this machine for Software Development Workstation and testing environment. So package selection is following: Desktop, Web server, Databases, Compiling tools, Java. Same method works also for servers, normal desktops and other setups, but of course different software selection. So let’s begin installation…

Burn Downloaded Image to DVD and Boot Computer Using Red Hat 6 Installation DVD

Check RHEL image MD5 sum and burn image to DVD with your favourite CD/DVD burner. And boot computer using Red Hat Installation DVD.


Red Hat 6 RHEL Installation

Read carefully and perform following steps to Install Red Hat Enterprise Linux 6.

Step:1-First of all select DVD as your First Boot Device. Save & Exit From BIOS and Reboot your System.
 
Step:2-After Booting from DVD you will get below screen. Select Install or Upgrade an Existing System and press Enter
 
Step:3-If you get following screen wait for some time for Anaconda to take you for the next step.

Step:4-Select your prefered Language from Below Screen. I prefer English is good for all so i have selected English Language for Tutorial Purpose.

Step:5-Select Keyboard Layout.

Step:6-In Following Screen you will able to see 4 Installation Methods, Let me explain Methods here:-
  • Local CD/DVD – It is obvious that If you use CD/DVD media then Choose this option.
  • Hard Drive – Select this if you have dumped your source into any other Linux partition.
  • NFS Directory – Select this If you have shared installation source shared using NFS.
  • URL – Select this if you want to install using FTP or HTTP Source link.
So For this tutorial and Step by step installation of RHEL 6 we will select Local CD/DVD Installation Method.

Step:7-If you are not sure about your media then Select OK to verify else Select Skip.

Step:8-If your media is fine till now it will take you to the Graphical
Installation Screen
of RHEL 6 Installation. please wait for few minutes
after getting following screen

 
Step:9-Following is the first screen after Getting GUI Installation Wizard Click on NEXT to Continue…


Step:10-Because we are installating Beta Release of Red Hat Enterprise
Linux you will get warning of pre-release version. Have a look at
following screen….


 Step:11-Now, For installating RHEL there is two storage options are available Let me explain bit…..
  • Basic Storage Devices – Select this if you are installating on Local Hard disk or some local Storage
  • Specialized Storage Devices -  Select this if you are installing on SAN ( Storage Area Network ) or DASD ( Direct Access Storage Devices) 


 Step:12-Don’t worry if you don’t get following step, because if your Hard disk is blank then only you will get following screen.

 Step:13-Set your Hostname here. Remember FQDN hostname is always preferable (i.e. tejasbarot.ask4itsolutions.com)

 Step:14-If you want to configure network during installation then click on Configure Network and Configure your Network by Editing Ethernet Cards.


 Step:15-Now It’s time to Select Time Zone.

 Step:16-Now Set your root Password.
 Step:17-Make sure your password is not combination of
dictionary words other wise you’ll get screen as below.

 Step:18-Now We reach to the most Important part of any Linux Installation, Its Partition time guys…………Not explaining any option because it is already nicely explained there on screen itself. I prefer Create Custom Layout because i can show you guys how to make partition during installation. If you have windows already installed then please select this option……………………Select Create Custom Layout and  click on NEXT.

 Step:19-I have got blank Hard Disk, So If you have also got Blank Hard Disk then you will get screen like below :-

 Step:20-Here we’ll create only Three Most required Partitions….. You can create as per your requirement. SoNow Let’s start creating Partitions……..
 Step:21-Let’s create boot partition first. Click on Create -> Select Standard Partition, Enter /boot as Mount Point, Enter Size 500MB, and Keep all information as it is, Click on OK. 

 Step:22-Now Let’s create swap partition Click on Create -> Select Standard Partition, Select Swap as File system Type, Enter size 2000 ( I suggest it should be double than RAM) and Keep all information as it is, Click on OK. 


 Step:23-Let’s create root partition. Click on Create -> Select Standard Partition, Enter / as Mount Point, Select Fill to maximum allowable size and Keep all information as it is, Click on OK.

 Step:24-Now If everything is perfectly fine then you will able to see following screen

 Step:25-This is the screen which is going to Format all your partition which you have created,
Here if you are not sure then reboot your system without clicking on
any thing. If you are sure that you want to continue then click on Write Changes to disk.

 Step:26-Here is the Boot Menu screen. You can set password for Grub here, You can modify booting entry here.

 Step:27-Different Kinds of Software packages are availabe so Select as per your requirement and click on NEXT. 

 Step:28-If you plan to do customize installation then click on Customize Now and Click NEXT and Select your required packages and then click Next. 

 Step:29-Installation has been started. Just get back and Relax for some time. It will take some time to get installed.


 Step:30-Congratulations Guys….. Your RHEL 6 is installed…….

 Step:31-Grub Screen of Red Hat Enterprise Linux 6 Beta ( RHEL 6)

 Step:32-Wait…………. RHEL 6 Beta is Loading………………………

 Step:33-First Boot Instructions…. Just Few Steps and That’s It.

 Step:34-This is the Welcome Message click on Forward 


 Step:35-Select Yes, I agree to the License Agreement and Click on Forward 

 Step:36-If you have RHN Login then Select Yes Otherwise Select No, I prefer to register at a later time and click on Forward.

 Step:37-Create Normal User and Click Forward 

 Step:38-Set your Date & Time Here.

 Step:39-Enable Kdump if you want to configure otherwise Click on Forward, That’s It.

 Step:40-Now It’s your RHEL 6 is installed and running.
Have a Fun with Red Hat Enterprise Linux 6 | RHEL 6 Beta.