Hello there! If you are new here, you might want to
subscribe to the RSS feed to receive updates.
Many
people these days use a Wi-Fi (IEEE 802.11) router, or they have a
broadband modem with built-in wireless. It’s amazing to me that in this
supposedly “high-tech” and “high-security” age, many people still are
completely unaware just how wide open their home network really is.
With a Wi-Fi modem, usually your provider will be smart enough to
lock down your wireless connection for you. But if you bought a wireless
router or access point and set it up yourself, there are a few things
you should know to keep others from “stealing” your connection and using
it for nefarious purposes…
If you use a Wi-Fi-enabled broadband modem, check with your service
provider or the manuals that come with it to figure out how to make sure
things are nice and secure.
On the other hand, if you bought your Wi-Fi box yourself and set it
up, you may have made Mistake #1: Plug and Play, baby! Sure, it DOES
work right out of the box. But that usually means that you are using
WEP,
or Wired Equivalent Privacy. It turns out that severe security holes in
WEP were identified way back in 2001. It’s a piece of cake to hack into
a “WEP-secured” network.
Fortunately, there are other options, although it takes a bit of
actual work. And yes, you might have to read a manual. Don’t worry –
it’ll be worth it. Besides, I’m hoping to get you started so that you’ll
be prepared for any strange acronyms and obscure technical terms you
might encounter.
The most common alternative to WEP is called
WPA2, aka Wi-Fi Protected Access. Although certainly not bulletproof, WPA2 is a much,
much better alternative to WEP.
So, the first thing you need to do is access your router’s
configuration page. Usually this is accomplished by pointing your
browser to the URI: http://192.168.0.1/ or something along those lines.
Check your manual!
I should note here that the following instructions are necessarily
vague. Obviously I can’t give detailed instructions on how to set up
every Wi-Fi router ever made, so I’m just going to try to give a nice
overview that should help you get started.
Alrighty, where were we… Ah yes: After logging in, you’ll want to
find something like “Wireless Configuration”. Sometimes you first have
to go into a “Configure” page, and then you’ll see the link to configure
the Wi-Fi settings.
The basic Wi-Fi settings page will probably include things like Mode,
Band, ESSID, and Channel. The only one you should really have to pay
any attention to is the ESSID. The ESSID is the name of the network that
you will need later in order to set up the connection on your computer.
Once you’ve poked around the basic Wi-Fi settings, you’ll want to
then locate the “Advanced” or “Security” options, and find some mention
of WEP and WPA2.
You’ll want to make sure that the system is NOT using WEP, and is instead configured to use WPA2. This is often listed as:
“PSK” stands for “Pre-Shared Key”. “Personal” refers to the same
thing. This is the mode you’ll want to use, since you probably don’t
have a Wi-Fi authentication server on hand since you aren’t a giant
corporation. The “Personal” or “Pre-Shared Key” part basically just
means that you’ll enter a secret code, which you will then have to use
to access the network from your computer the first time you connect to
the wireless router/access point.
There will probably be some sub-options to go along with your choice of WPA2. If you are given the choice of AES, TKIP,
or AES+TKIP, choose AES. TKIP is an outdated encryption scheme, whereas
AES is relatively secure. You might want to pick AES+TKIP to maintain
backwards compatibility if you’ve got some computers with older Wi-Fi
cards and/or drivers. If you can, it’s better to upgrade your Wi-Fi
cards/drivers in the old-school computer!
At this point, find the “passphrase” or “password” or “code” box or
whatever they’re calling it, and type in your Top Secret Code. Make it
something good – the longer the better. In fact, you’ll probably want to
check out my post on creating secure passwords.
Note that you will not have to type this code in every single time you
connect to your wireless network, so it’s actually better if it’s much
longer than a normal password.
Okay, you’re almost done.
There will be another option in the settings somewhere called
“Broadcast ESSID”. If you enable this option, your Wi-Fi box will sit
there and advertise itself continuously to the whole world. In other
words, it will send out its identifier to computers within range saying,
“Dudes! I’m a wireless network, wanna use me?” The ESSID broadcast
should be turned
off so that people can’t even see that
you have a Wi-Fi network running. When you go somewhere public and
suddenly you can see available wireless networks, that’s because the
Wi-Fi access point is broadcasting its ESSID.
One last thing to do: Find the Wi-Fi option called something like
“Access Control” or “ACL”. This page will give you a screen that allows
you to enable Wi-Fi access for only specific Wi-Fi adapters. What you
want to do is
allow only those MAC addresses that you enter. A
MAC (Media Access Control) address is like an IP address, except that
it’s supposed to be unique to the specific Wi-Fi adapter in your
computer. Even if two computers have the same make and model of network
adapter, their MAC addresses should be different. To find the MAC
address of your Wi-Fi adapter in Windows, do this:
- Open a command prompt window (Win-R, then type
cmd, then hit enter)
- Type
ipconfig /all and then hit enter
- Find the section with a “Description” that involves the terms “wireless” or “WiFi” or “802.11″
- Underneath the “Description”, there will be a “Physical Address” line with something that looks like:
01-2A-4F-16-97-B4
- Write that weird-looking string of characters down – it’s your Wi-Fi adapters MAC address!
Now, back in your router’s Access Control configuration page, enter
your MAC address and allow it access. You have just configured your
router to
only accept Wi-Fi connections from your specific
wireless card in your specific computer. No one else will be able to
access it, even if they have your ESSID and Top Secret Code. You’ll need
to repeat the above MAC-address-finding procedure for all computers
that you want to allow to access to your Wi-Fi network.
Now you can save your router’s configuration. Usually it will make you reboot the gizmo. Let it reboot.
When it’s done, go into your OS and set up a new WiFi connection. Be
sure to select the option “Connect even if network is not broadcasting”
or something along those lines. That tells your computer that your Wi-Fi
router or access point is not broadcasting its ESSID, so it will have
to just take your word for it and try to connect anyway.
When the ESSID broadcast is turned off, your wireless network will not show up when your computer searches for local wireless networks! Don’t worry, it will still work since you’ve set everything up brilliantly.
In Windows XP and Vista, you’ll have to set up a wireless network
manually since the ESSID is not being received by your computer. You’ll
have to select WPA2-Personal, enter the ESSID, choose AES for the
encryption, tell windows to connect even if your router isn’t
broadcasting, and finally enter your Top Secret Code. Then, try to
connect!
If it doesn’t work, don’t panic. One thing you can do is remove the
MAC address Access Control and re-enable the ESSID broadcast. This will
allow the network to show up automatically on your computer, and you’ll
be able to connect more easily. Once you have connected, disconnect,
change the settings in the router back to the way they were before (no
ESSID broadcast, MAC access control on), and try again after tweaking
your wireless connection settings on your computer to account for the
now-enabled “no ESSID broadcast” option. This is a good way to
troubleshoot in case your computer has bigger problems like a bad Wi-Fi
card, a wonky driver, etc.
Okay, so this all sounds really complicated. And, well, it kind of
is complicated the first time you do it. But there is a good reason for all of it.
First, you are using WPA2 with AES, which is far more secure than
WEP. Then you added to that the “do not broadcast ESSID”, which
basically put your Wi-Fi network into “stealth mode”. And then, on top
of all that, you have another layer of protection in the form of MAC
address-based access control. If you successfully set all this up, your
wireless network will be far more secure than most out there! And then
you can go tell everyone what a genius you are!
Finally, a few notes about real security vs. imagined security…
Assume that any publicly available encryption scheme is easily hacked
by those with the proper tools. You are never 100% safe. You have never
been 100% safe, so this shouldn’t come as a shock to you. You could
keel over dead in the middle of this sentence. Such is life.
Also, MAC addresses are not a bulletproof way to identify a
computer’s network hardware. MAC addresses can be “spoofed”, i.e.
changed. Theoretically, I could change the MAC address of my laptop’s
Wi-Fi adapter so that it looks like your laptop as far as your router is
concerned.
And just because your Wi-Fi router/access point isn’t broadcasting
doesn’t mean that people can’t see it – if they know how! It just means
that
most people can’t see it.
That’s the whole point of this exercise: you are making your Wi-Fi
connection as secure as possible in order to make yourself less of a
target to annoying people who want to cause you trouble. You won’t be
surfing inside an impenetrable force field or anything like that. You
will simply be safer than most people, not only because you have
multiple layers of basic protection, but also because you have a lot
more knowledge about how these things work.
A little knowledge can go a long way!


 Are
you ready for a trip down Nostalgia Lane? Then you will definitely
enjoy this picture slide show of the early launch designs for the web’s
biggest websites.
Are
you ready for a trip down Nostalgia Lane? Then you will definitely
enjoy this picture slide show of the early launch designs for the web’s
biggest websites.




 Last month we shared an ultra-high resolution image of Earth with you,
courtesy of NASA’s Suomi NNP satellite. Now we’re back to highlight the
process by which NASA generates such beautiful images.
Last month we shared an ultra-high resolution image of Earth with you,
courtesy of NASA’s Suomi NNP satellite. Now we’re back to highlight the
process by which NASA generates such beautiful images.  If
you’re looking for a new wallpaper this ultra-high resolution image of
the Earth’s surface spans a whopping 8,000 by 8,000 pixels.
If
you’re looking for a new wallpaper this ultra-high resolution image of
the Earth’s surface spans a whopping 8,000 by 8,000 pixels. 
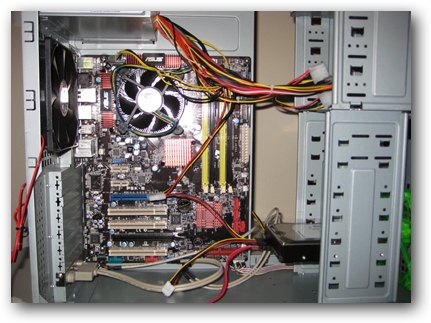
 If
you’re one of those people who likes to build and upgrade your own
computers, or if you have just decided to make your first attempt at
upgrading an older system, there is one thing you may be wondering: Do I
have to reinstall my OS?
If
you’re one of those people who likes to build and upgrade your own
computers, or if you have just decided to make your first attempt at
upgrading an older system, there is one thing you may be wondering: Do I
have to reinstall my OS?
 What
happens when you discover your copy of Windows is invalid? You probably
will get a Windows Genuine Advantage (WGA) notification informing you
that you’re illegal, and you need to purchase a legal license.
What
happens when you discover your copy of Windows is invalid? You probably
will get a Windows Genuine Advantage (WGA) notification informing you
that you’re illegal, and you need to purchase a legal license.
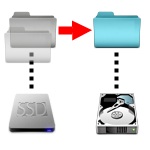 Let’s
say you’ve got Windows 7, and you install a second hard drive. Perhaps
you have an SSD as your primary drive, and you want to store your GB’s
of MP3s, videos, and documents on your second data drive.
Let’s
say you’ve got Windows 7, and you install a second hard drive. Perhaps
you have an SSD as your primary drive, and you want to store your GB’s
of MP3s, videos, and documents on your second data drive. I’m
sure you’ve all heard some hype about 64-bit this and 64-bit that. The
thing I read the most is that a 64-bit operating system or piece of
software is automagically twice as fast as a 32-bit one. Not so. Worse
yet, some operating system vendors market their product as having an
“advanced 64-bit architecture”, when the truth of the matter is that
their OS is not fully 64-bit.
I’m
sure you’ve all heard some hype about 64-bit this and 64-bit that. The
thing I read the most is that a 64-bit operating system or piece of
software is automagically twice as fast as a 32-bit one. Not so. Worse
yet, some operating system vendors market their product as having an
“advanced 64-bit architecture”, when the truth of the matter is that
their OS is not fully 64-bit. Click here to read Part 1!
 Here’s a little problem that drove me crazy: How do you determine the Master Browser in a Windows Workgroup?
 There are many things to love about Windows 7. It truly is “Vista done right”, sad as that may be. But it ain’t perfect.